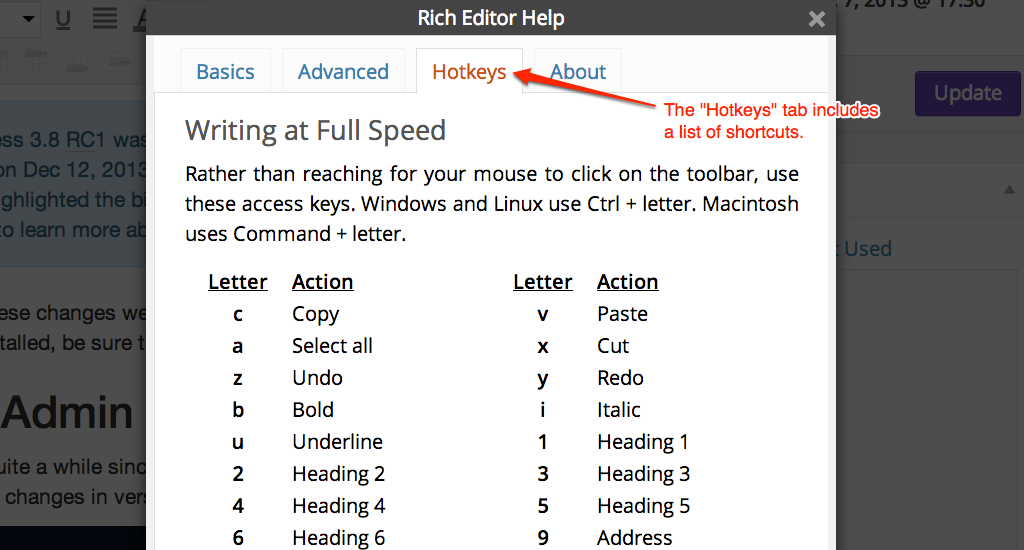
List of WordPress Keyboard Shortcuts for Writing at Full Speed

Problem with Safari

Unfortunately, Safari has a different behavior for cmd + 1, cmd + 2, etc. They open a website from your Favorites Bar. There is no default way to turn off this functionality, and even deleting all your favorites doesn’t work. Open source to the rescue. There’s a plugin you can add to Safari to change the default behavior to switching tabs. I haven’t tested to see if this will allow the Headings shortcuts to work or not, so if you use Safari & are willing to give this a shot, please let us know.

If you know of any WordPress keyboard shortcuts that we left out, please let us know in the comments.

via List of WordPress Keyboard Shortcuts for Writing – WordPress Hotkeys.

Use Google Forms to create a self-grading quiz

1. Create the form

Follow the basic steps in our earlier TechRepublic post, “Use Google Forms to create a survey” to create your form.

2. Accept responses

Make sure the form is active and set to accept responses. Open the Sheet created with the Form in your Google Drive, then make sure “Accepting Responses” in the Form menu is checked.

Make sure your form is set to accept responses

3. Create a new spreadsheet page

Create a second Sheet within your spreadsheet document. Click on the “+” icon in the lower left corner to add a new Sheet. This adds a new spreadsheet to your document. This is the sheet we’ll use to create a row with the correct answers, and to compare responses to those answers.

Add a second Sheet to use for grading

4. Create the “answer key”

The simplest way I’ve found to create an “answer key” is to take the quiz myself. From the Form menu, choose “Go to live form”. This opens the quiz. Complete the quiz with the correct responses. After you click “Submit”, you’ll see the confirmation page. You can close this tab/window and return to the Form’s spreadsheet.

Create the answer key by filling out the form with the correct responses

The correct answers should now be displayed in your spreadsheet. We’ll need to copy these to our answers / grading sheet. Click on the row number (#2 in my example) where the answers are displayed. This selects the entire row. Choose “Edit – Copy” (or Ctrl-C) to copy the row.

Copy the correct responses to the answer sheet

In the bottom left, click on “Sheet 2” to change to the spreadsheet where we’ll be doing the grading. Click on row number 1 and choose “Edit – Paste”. We now have the correct answers listed in Row 1 of Sheet 2.

5. Compare responses

To compare a response to the correct answer, we’ll use a spreadsheet formula. If the response matches the answer then we’ll return points. If the response doesn’t match the answer, then the points will be zero.

Compare responses to the correct answer

For our first cell, we’ll use the following formula in cell B2 on Sheet 2, our grading sheet:

=IF(Sheet1!B3=Sheet2!$B$1,5,0)

Read this as follows: If the contents of Sheet1!B3 equals the answer found in Sheet2!$B$1 then return a value of 5 points, otherwise return zero.

The $ symbol in the Sheet2!$B$1 is essential. It ensures that when you copy and paste the formula into another cell, the item will still point to the correct answer. Depending on your survey and cell setup, the specific cells may vary. The basic idea, though, is to compare an answer cell to a response cell.

Similarly, for the second cell, we’ll use the following formula in Sheet 2, cell C2:

=IF(Sheet1!C3=Sheet2!$C$1,2,0)

Note how we adjusted the point value of this second question to return 2, instead of 5.

Next, we created a column for total point values in Column C. The formula here is:

=SUM(B2:C2)

With a long quiz, simply use the first and last cells containing values in the row as your starting (e.g., B2) and ending (C2) values. We now have a Total Points column.

6. Copy grading row, as needed

Select your now completed self-grading row (in our case, Row 2 on Sheet 2) by clicking on the Row number (e.g.), choosing “Edit – Copy”. Then paste the “self-grading” row into as many rows as needed. For example, if you’re anticipating responses from 20 people, make sure your formulas fill at least 20 rows of your spreadsheet.

In our case, here’s what our responses look like, stored on Sheet 1.

Sample complete responses

And, the corresponding graded answers, which are stored and calculated on Sheet 2.

Sample complete grade sheet

Google Forms “Quiz” tips

Self-grading in Google Forms works only with answers that can be an exact match, such as multiple choice responses. It won’t work with free-form text or paragraph fields. You can certainly still use a Google Form for a test that includes essay responses, but those will have to be graded manually.

In a real-world quiz, I recommend you include a required “Name” field with a text format on your form. This way, you’ll capture the name of the respondent. If you use this in a class or testing setting, I suggest you make ALL fields have a required response. This ensures that someone doesn’t accidentally skip a question.

Finally, make sure that respondents know they’ll need to keep their browser tab or window open. If you use a form for a long-format quiz or exam, respondents might accidentally close their browser. You might include a bit of advice on the Form to remind people to keep their browser open.

Google Forms has saved me a great deal of time grading short quizzes. I am still waiting, however, for Google to release a system capable of evaluating essay responses to complex questions such as the “answer to life, the universe and everything”. In the meantime, let me know how you’ve used Google Forms to evaluate or grade responses.

via Use Google Forms to create a self-grading quiz – TechRepublic.

Can I distribute my iPhoto slideshow using the iPhoto theme music selection to YouTube or would that be copyright infringement?

There are a number of con-men who think that they can earn a quick buck from claiming that they own the copyright to Apple’s royalty-free jingles and sound effects included with the iLife applications. These are all free to use, as clearly stated in section 2.C of the iLife Software License Agreement:

“You may use the Apple and third party audio content (“Audio Content”) contained in or otherwise included with the Apple software, on a royalty-free basis, to create your own original soundtracks for your video and audio projects. You may broadcast and/or distribute your own soundtracks that were created using the […]

via Can I distribute my iPhoto slideshow using the iPhoto theme music selection to Facebook or would that be copyright infringement? – goto: answer.

Test of Lottery Application Links

Post the link(s) on your website.

  • Make sure you post the links somewhere visible and easy for families to find.
  • Important Note:clicking the URLs listed below causes a secondary URL to be generated (ex: (https://secure.infosnap.com/family/message.aspx?code=actionprivate). The secondary links will not function if posted to your website. Please post URL exactly as below.
  • To ensure optimal security the form should open in a new tab or window.

Live Links:

Application:

I will monitor the solution following launch to ensure everything is going well, but should anything unexpected arise please contact me.


Thanks,

Chris

Hints for New Bloggers: Change Category, Enlarge Photo, Add Title!, Making Doc Links open in New Window

http://youtu.be/ndIGY8pEREM

Hints for New Bloggers:

Change Category: by default the category will be Announcements– but if every post is in Announcements and not Language Arts, History or Math, etc., then category links in the sidebar (one of WordPress’s most powerful content-management-tools) will be useless. As you make a new post if you save draft before you choose history or math, etc. it will default to Announcement… so best to get in the habit of choosing the category/ies when you open a new post window.

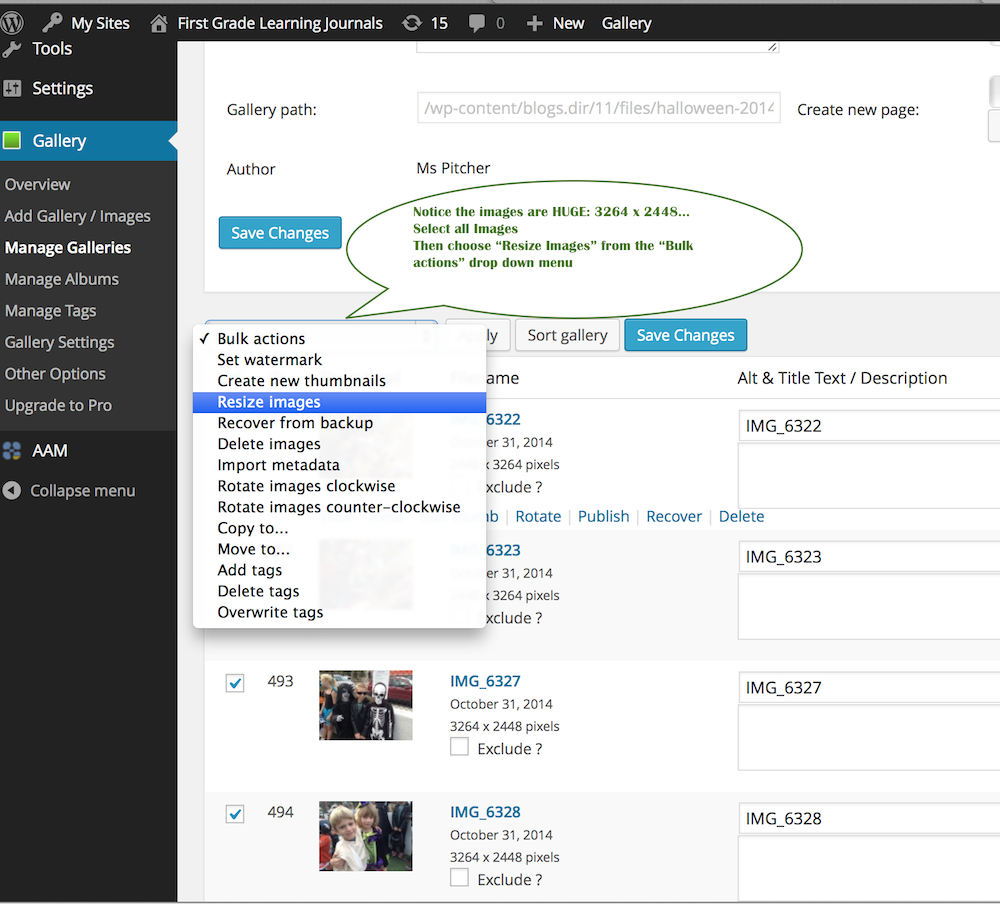
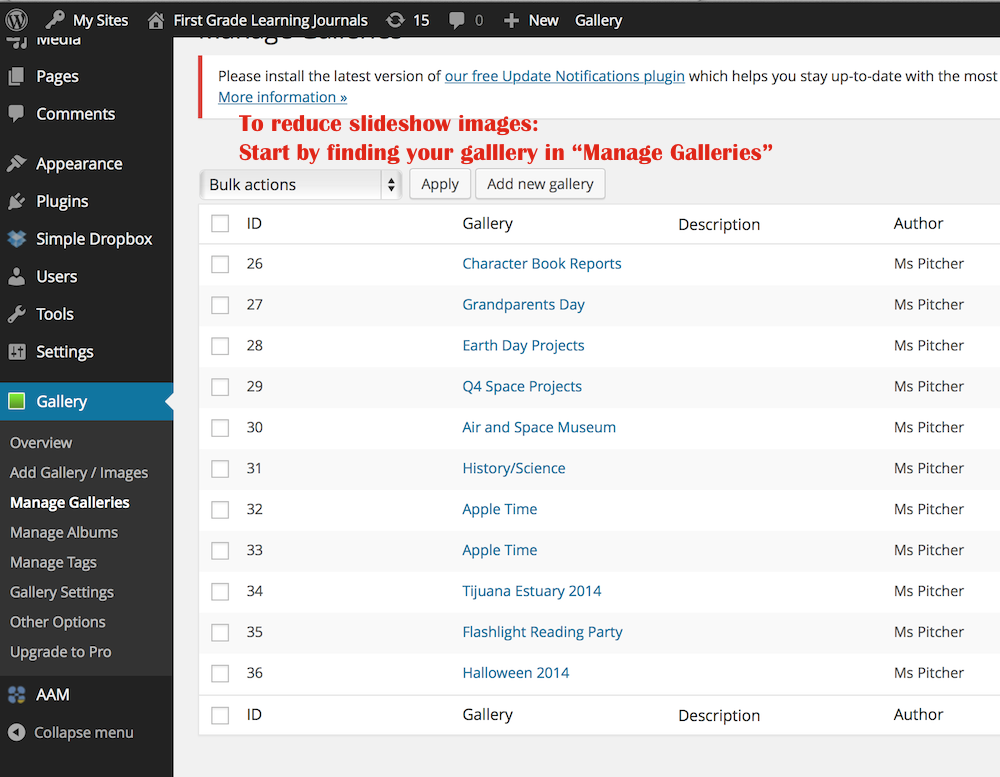
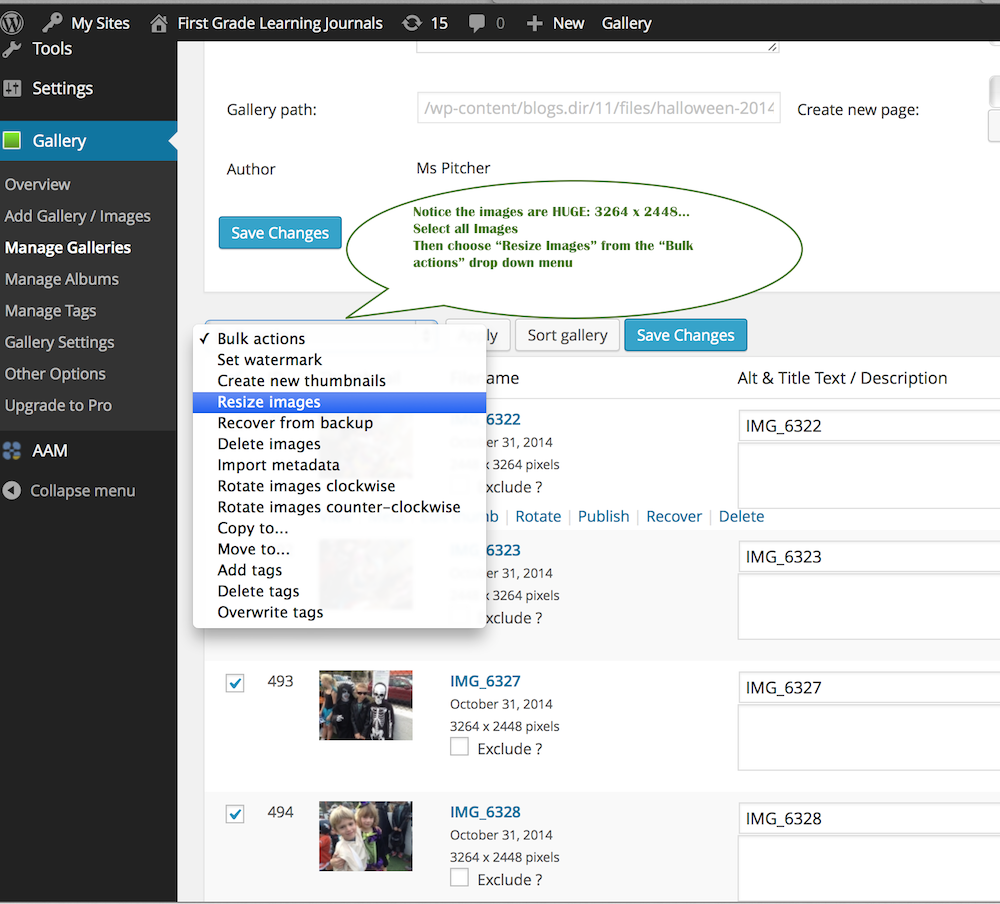
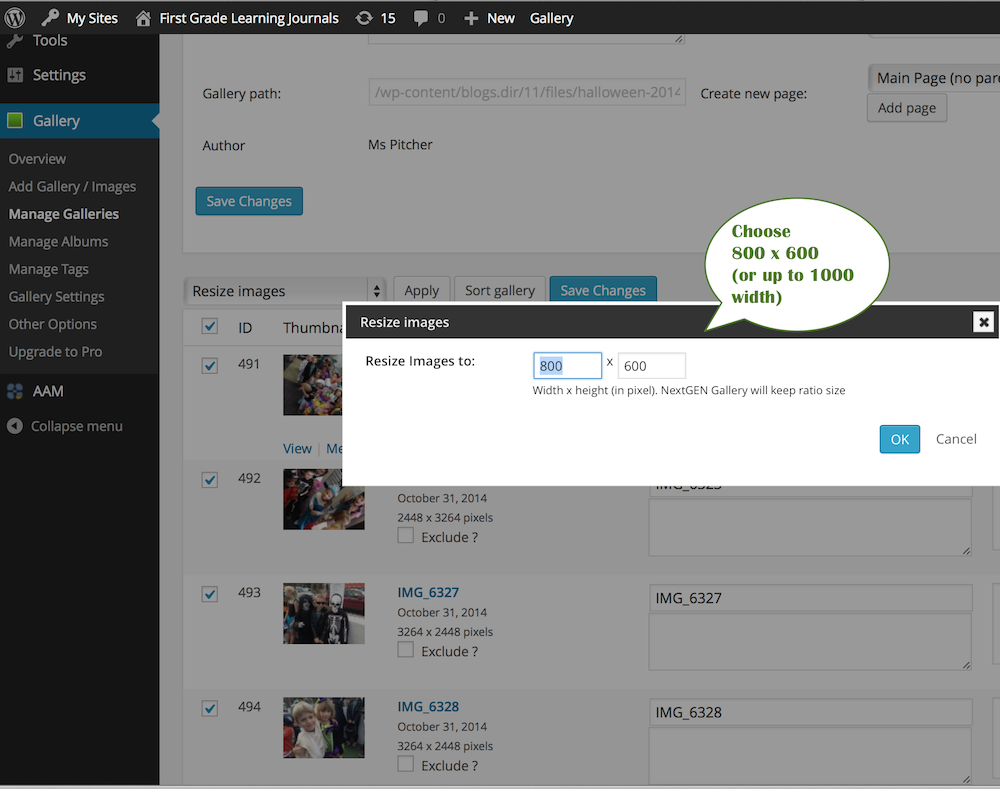
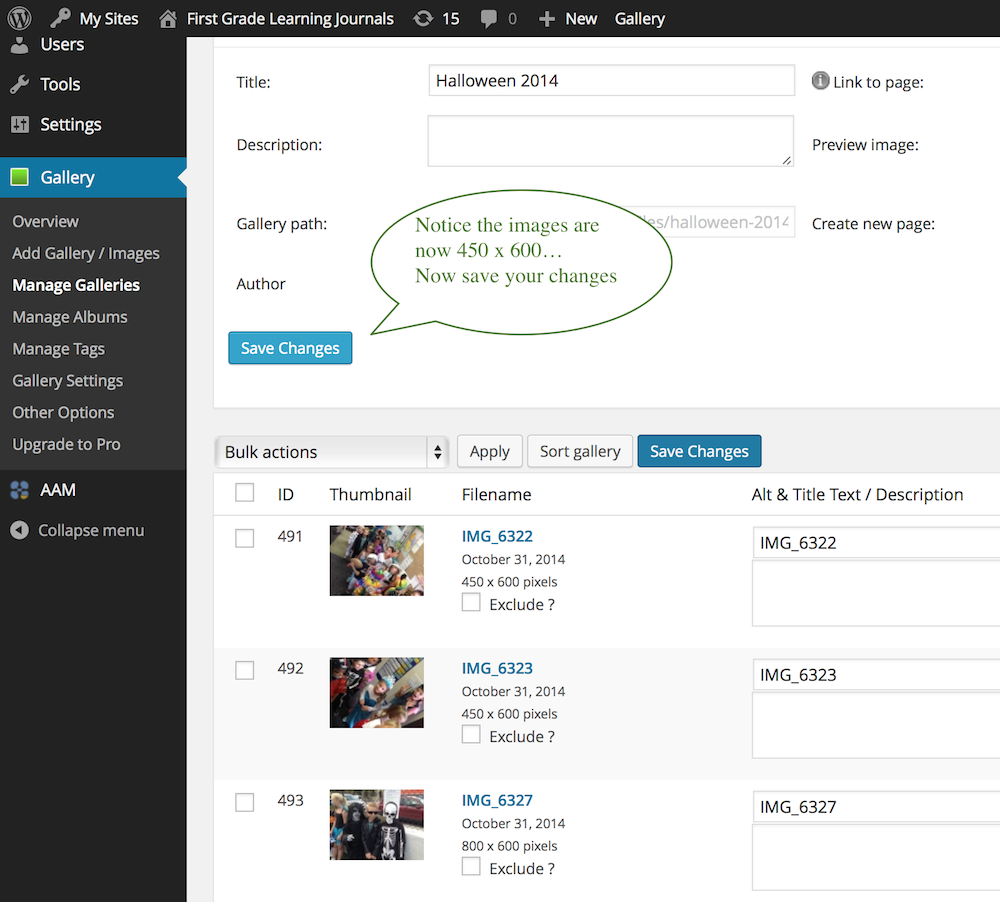
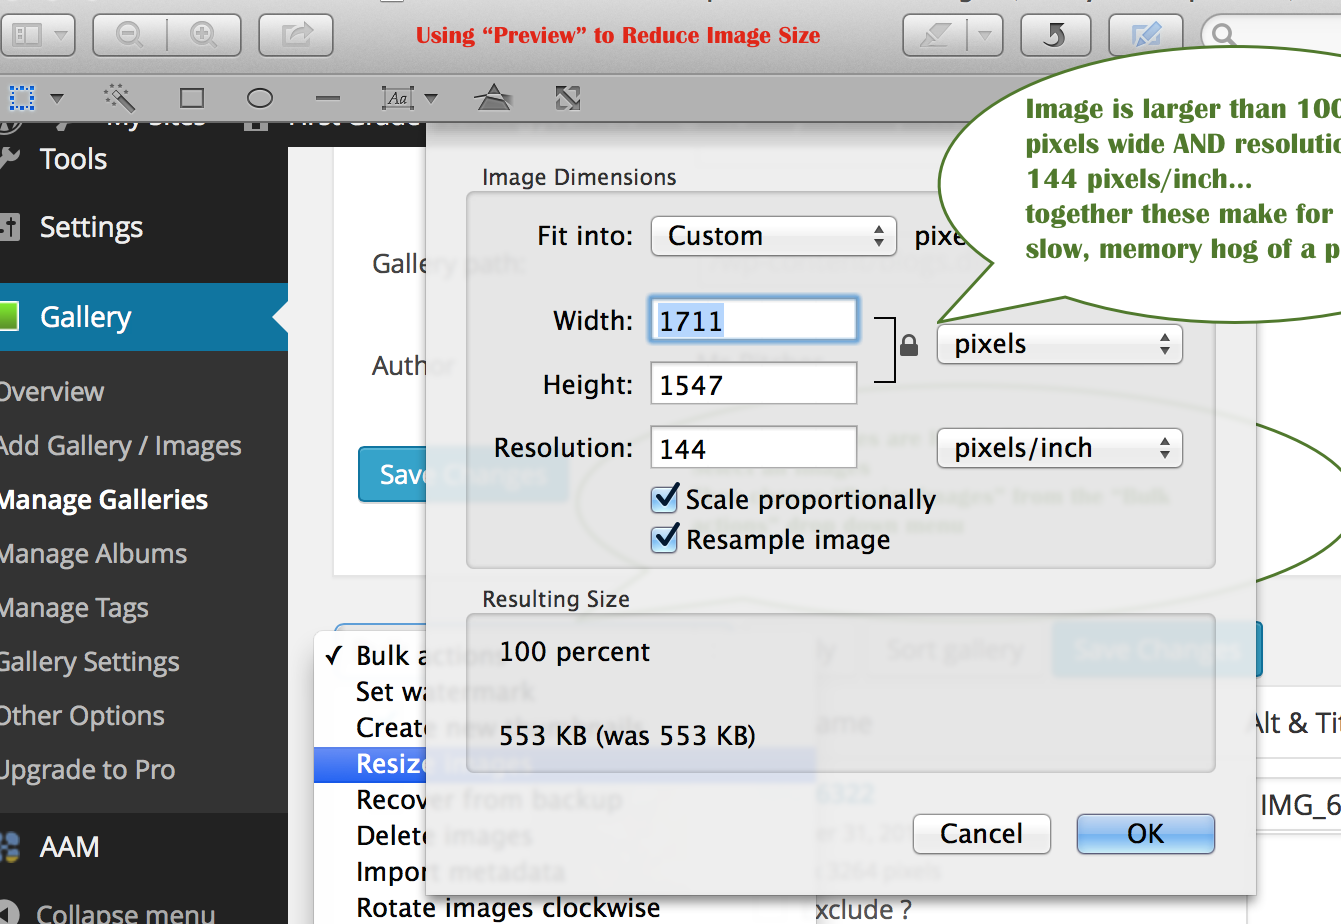
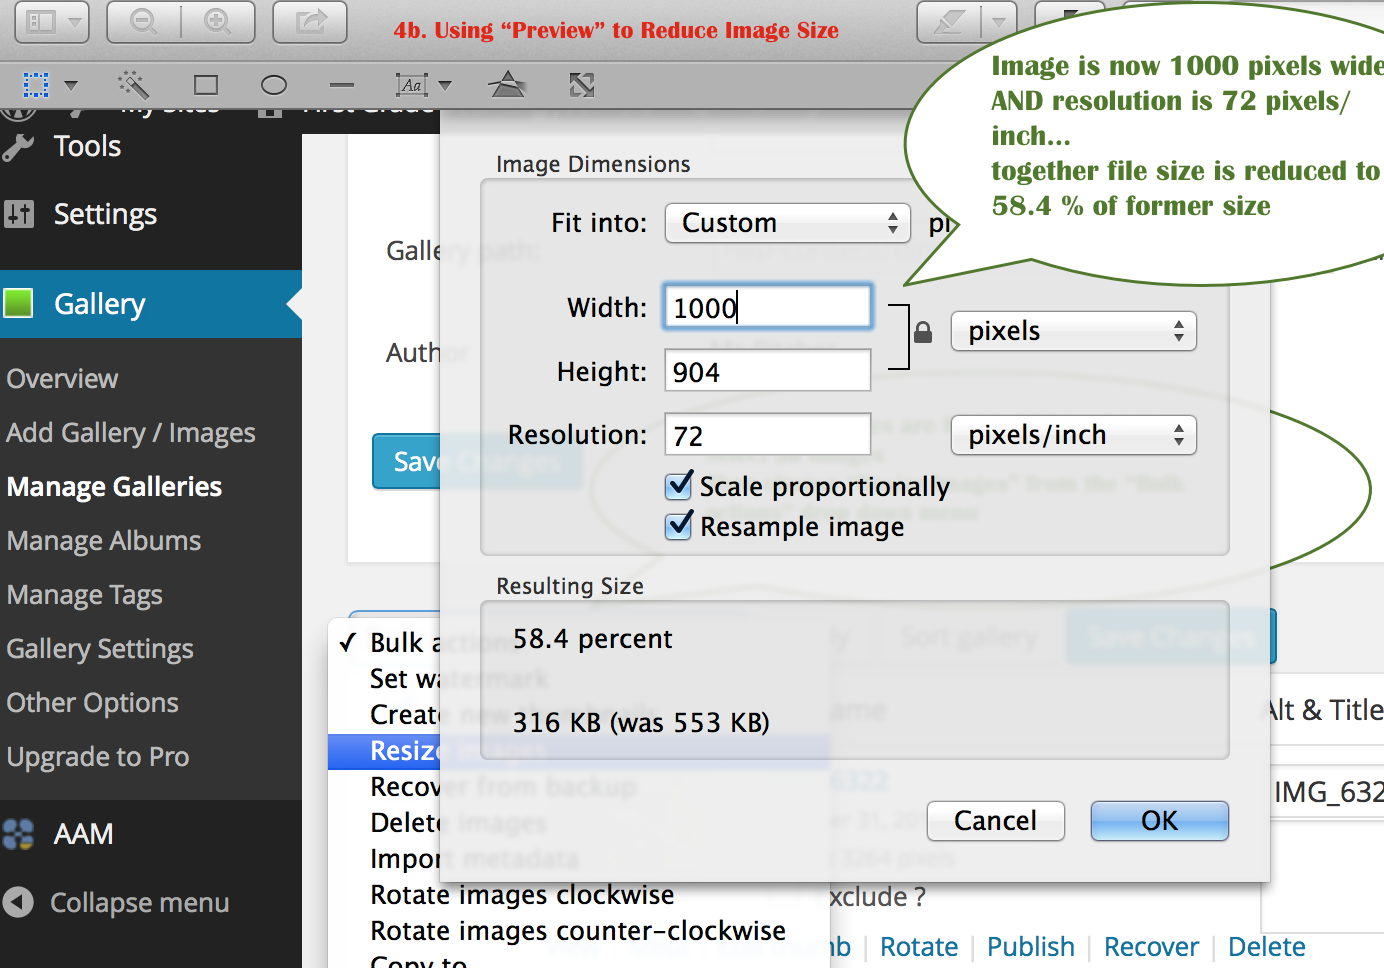
Enlarge Photo: we want photos to be as large as possible, but not so large that they break out of the frame–no more than 1000 px wide and they should be 72 dpi. You can batch edit the size of multiple photos in Preview* photo editing program that comes with your mac… or when making slideshows and importing multiple images through gallery, choose the reduce to 800 X ? option… *Note; you can set Preview to a custom width of
no more than 1000″ and it will remember it.

Add Title! Can’t forget to add a title to each blog–that’s what shows up in search, in Latest Posts, etc.

Making Doc Links open in New Window: if you choose open in new window it leaves your blog post open in a tab while student or parent looks at the syllabus, etc. they are downloading.

iBooks: How to sync iBooks between devices

iBooks: How to sync iBooks between devices

Your books, collections, highlights, notes, and bookmarks are available automatically across your Mac and iOS devices—just use OS X Mavericks, iOS 6 or later, and the same Apple ID to sign in to the iBooks Store.

OS X Mavericks v10.9 and later includes the iBooks app. This app works like iBooks on your iOS devices.

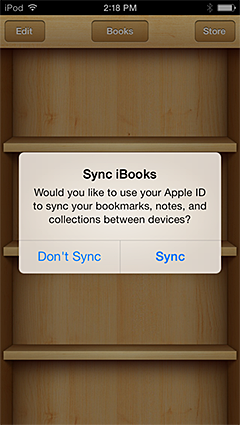
If you buy a book on your Mac, it’s automatically available on all of your iOS devices with iOS 6 or later. The same is true if you purchase a book from your iOS device. iOS 7 even prompts you if you already have purchased content. You can even synchronize your bookmarks, notes, and collections across your devices.

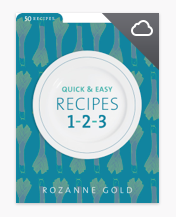
Items purchased on other devices may appear in your library with a cloud badge in the corner of the book’s cover. This indicates that the item is available, but hasn’t been downloaded to your Mac or iOS device. To download the item and start reading it, simply click or tap the book you want to read. The book downloads and opens after a few moments, depending on your current connection speed.

If you don’t see all of your purchased items in iBooks, make sure you “Show All Purchases” is turned on:

To see all your purchased books on your Mac, choose View > Show Purchases in iCloud.

To see all your purchased books on your iOS device, choose Settings > Books > Show All Purchases.

via iBooks: How to sync iBooks between devices.